
Here is a 3D piece I did for the #mermay hashtag this year! I did it on a whim over the weekend. I normally tend to noodle on personal projects for a very long time and rarely finish them so this was a big accomplishment for me.
Check out this quick breakdown video I made. It’s not a full timelapse.
I started off in ZBrush from a sphere. Trying to push myself to practice other CG skills besides lookdev more such as modeling and finding it very satisfying. Modeling has always been a weak spot since school since we didn’t really learn it in depth, and I didn’t pick up ZBrush until after a couple years in the industry. But I am starting to feel comfortable sculpting now and seeing the appeal.
Since this was a quick project I just used auto retopology and did quick UVs in Maya. I re-used eyes from another personal project not yet done and modified them. Then the bulk of the remaining work was done in Mari + Houdini.
I opted for Mari as a texture package since I prefer it for its direct painting tools, and this project didn’t involve a lot of material work where Substance Painter shines. Personally, I find Substance Painter a more intuitive package, but unfortunately it is lacking in a lot of areas. Mari also has a lot of similar procedural capabilities, but in a fully node-based workflow, which can make it more flexible. This also makes it easy to share data between different texture channels.
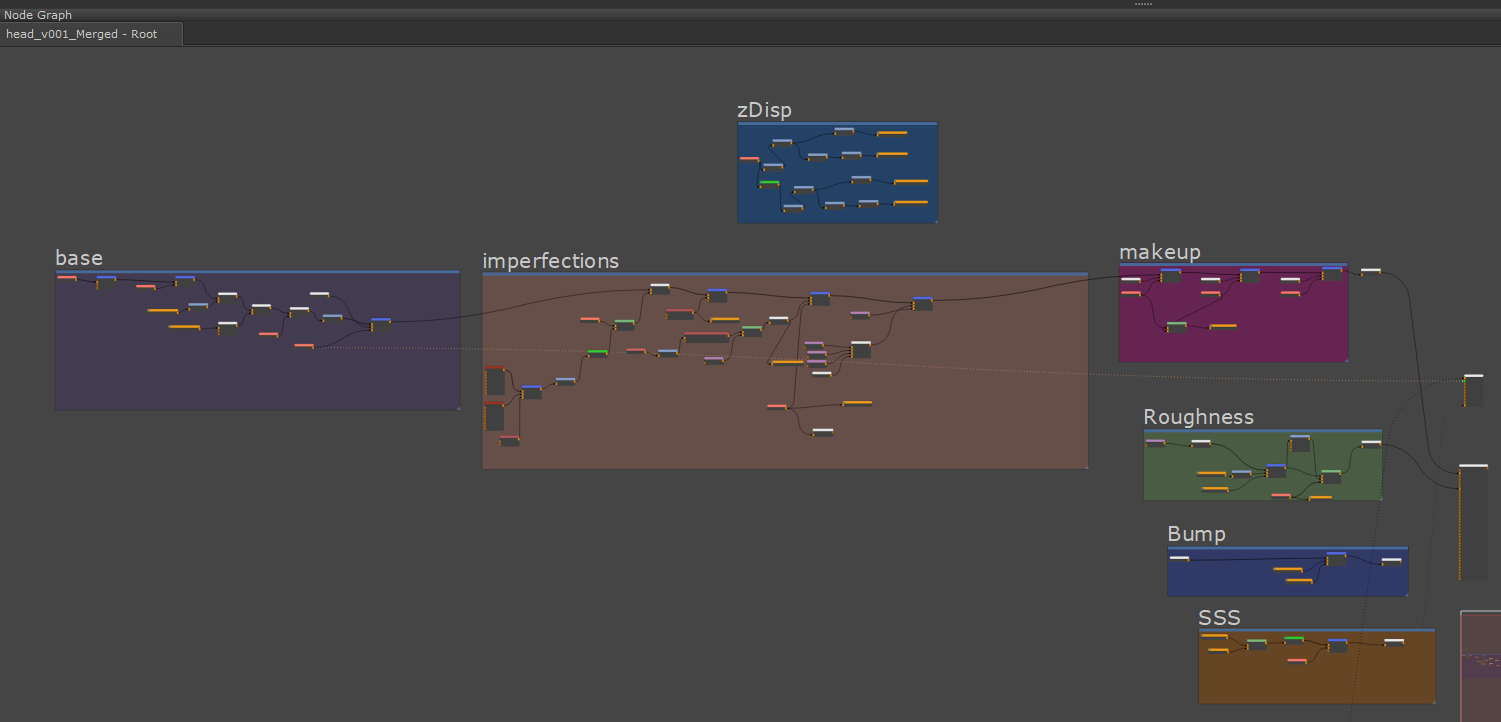
Organized node graph
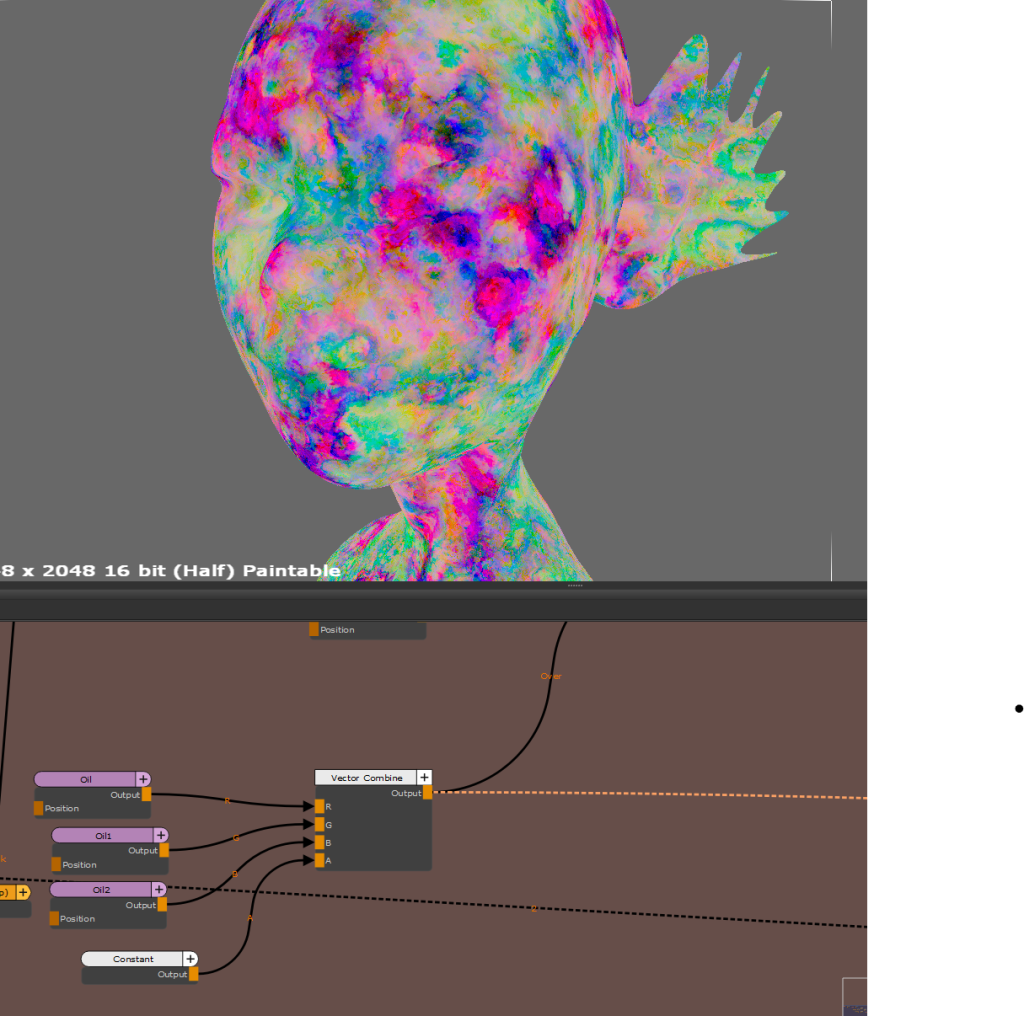
Node graph procedural which would normally require jumping to Substance Designer
After that, I used Houdini to set up the grooming. I extracted curves off of the blocked out hair tubes done in ZBrush and built the groom off of that. The eyelashes and eyebrows were done with hand drawn guides which I find to be art directed and efficient. I find Houdini overall preferable to XGen due to the flexibility and non-destructive workflow, but its direct grooming tools are somewhat lacking. Some of the modifiers are also quite procedural looking out of the box in a bad way. I’m hoping to develop some better hair tools in the future for my projects.
Then, Houdini + Solaris (with USD) was used for the final look development and rendering. The scene assembly takes some setup, but as I’ve done it before now, I can simply re-import a setup from other projects and swap out the assets. The non-destructive nature of Solaris scene assembly (which is not unique to USD to be precise), makes it easy to update assets and see the scene as a whole as opposed to an old school Maya lighting workflow. The render delegate I used was Arnold.
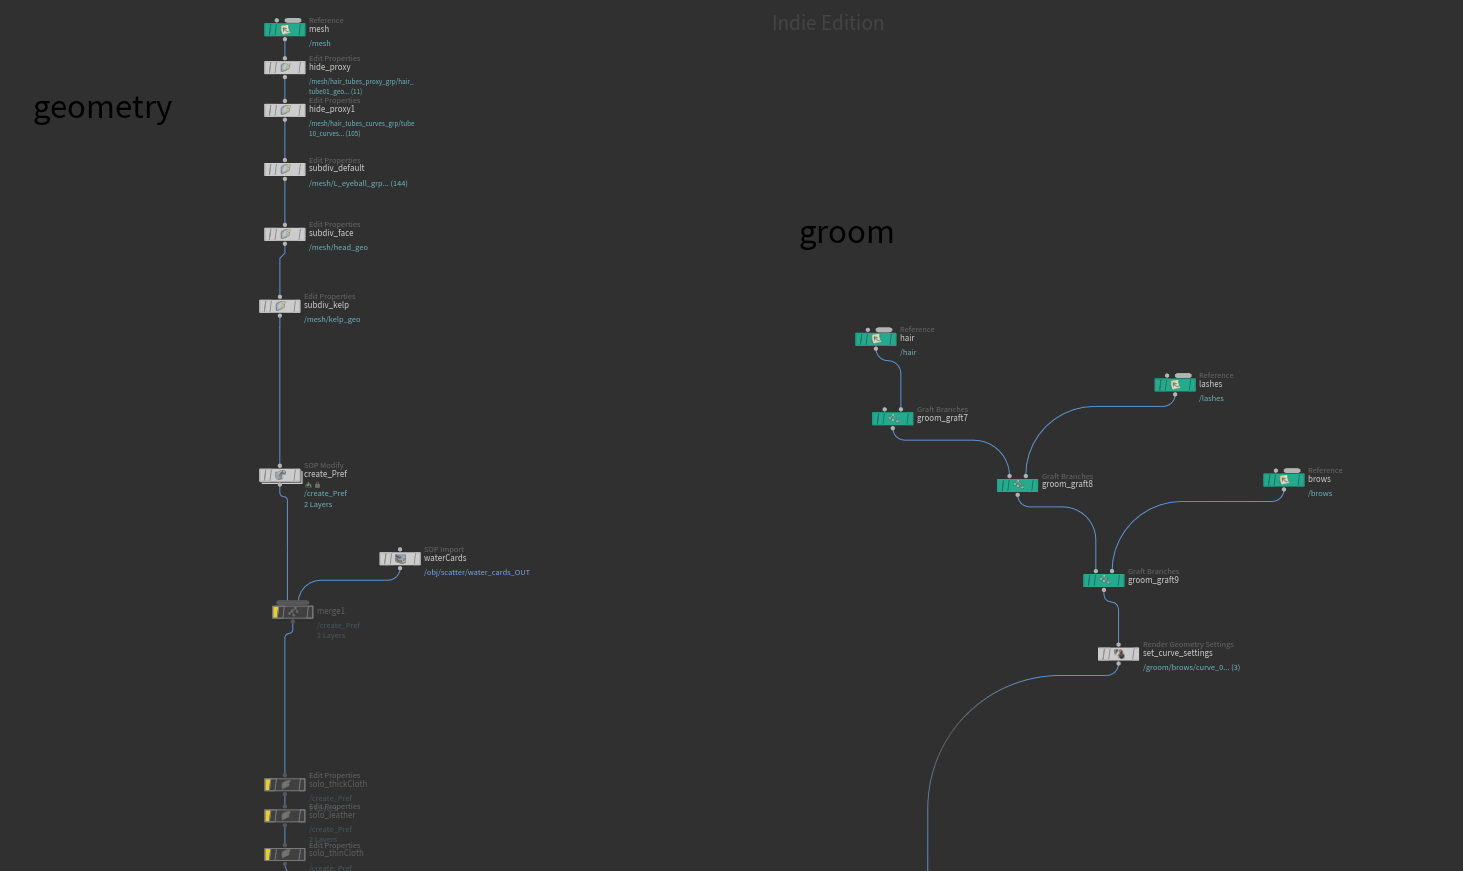
For example, above you can see how the geometry stream and hair streams are set up, combined, with their references explicit and clear. It becomes very easy to update anything and debug issues (disabling a graft for example). You can also see how I have disabled “solo” nodes set up to isolate certain sets of geometry while doing lookdev. The rest of the scene is set up in a similar way for lights and materials.
Lastly, some quick comp work and Photoshop paint work was done (mainly for the outside bg).
Hopefully I can do a real timelapse of some future work to share.